Centralized Deployment
Managing a large number of BI artifacts across different environments can become complex over time. Each integration flow or service, if deployed independently, can lead to higher operational overhead and increased resource consumption. Centralized deployment simplifies this by bundling all related integration artifacts into a single deployable unit, enabling more efficient resource utilization and streamlined deployments. This approach is ideal when multiple integration solutions need to be deployed and managed together across environments.
Centralized deployment typically involves two repositories:
Source repository (CI)
Typically, a single integration can consist of multiple components, each implemented as a separate BI project. These components can represent distinct functionalities or services that collectively form the complete integration solution. By organizing the integration into multiple projects, the source repository ensures modularity, reusability, and easier maintenance. Each project can be developed, tested, and published independently, allowing teams to work on different components in parallel while maintaining a clear separation of concerns.
The source repository is responsible for the continuous integration (CI) process, which includes:
Steps in the CI process:
Step 1: Prepare server environment
- Provision the VM or Bare-Metal Server.
- Ensure the server meets the hardware requirements for your application (CPU, memory, disk space, etc.).
- Configure the server OS (Linux is recommended for production).
Step 2: Install prerequisites
- Visual Studio Code: Install Visual Studio Code if you don't have it already.
- WSO2 Integrator: BI Extension: Install WSO2 Integrator: BI.
Step 3: Create and implement BI projects
- Create a new integration project using the BI VS Code extension.
- Add a meaningful description to the README.
Note
The README is required when you publish a package to a repository. You can edit the content to add a meaningful description about the integration project.
- Implement business logic using the drag-and-drop designer or by writing Ballerina/DSL code.
Tip
Use shared modules or libraries for common logic and avoid duplication.
Step 4: Add tests (optional)
- Use the
Test Explorerto create integration tests for services and connectors.
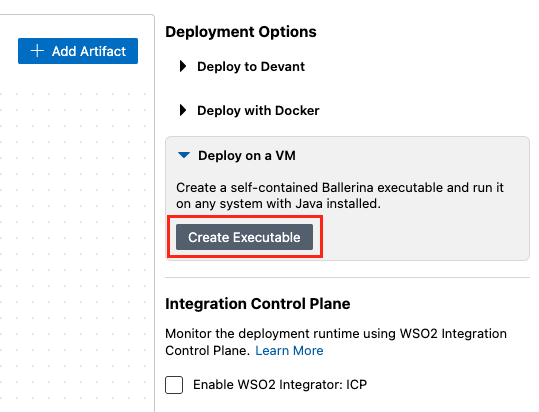
Step 5: Build or pack the artifacts
Build the project and create a self-contained executable and deployable .jar artifact.
Alternatively, use the Ballerina CLI to pack the artifacts for use in a consolidated package.
bal pack
Step 6: Publish artifacts
After packing the project, publish the generated artifacts to a shared artifact repository (e.g., Ballerina Central, GitHub Packages, Nexus, or internal registry).
bal push
Publish to Ballerina Central
- Create an account on Ballerina Central
- Navigate to the Dashboard and acquire an access token.
-
Download and place the
Settings.tomlfile in your home repository (<USER_HOME>/.ballerina/). If you already have aSettings.tomlfile configured in your home repository, follow the other option and copy the access token into theSettings.tomlas follows.[central] accesstoken="<token>"Note
If you are working in a context where it is not possible to save the
Settings.tomlfile (e.g., within a CI/CD pipeline) you can set the access token via theBALLERINA_CENTRAL_ACCESS_TOKENenvironment variable.export BALLERINA_CENTRAL_ACCESS_TOKEN="<token>" -
Publish the package
bal push
Refer to Publish to Ballerina Central repository for more configuration and information.
Publish to local repository
bal push --repository local
See Use custom repositories for packages management for more information.
Publish to custom repositories
BI supports Maven repositories such as Nexus, Artifactory and GitHub packages.
Follow Using custom repositories for package management to learn more about setting up custom repositories to publish packages.
Tip
Automate the above CI steps using GitHub Actions or your preferred CI tool.
Deployment repository (CD)
The deployment repository acts as the central hub for production-ready integration artifacts. It collects and consolidates the required applications from one or more source repositories, enabling centralized configuration and deployment. This repository streamlines the deployment process by orchestrating the integration of these applications and preparing them for deployment to the target environment. By centralizing deployment management, it simplifies configuration, enhances maintainability, and ensures consistency across environments.
Steps in the CD process:
Step 1: Prepare the runtime environment
- Provision a server or containerized environment (e.g., Kubernetes, Docker).
- Install WSO2 Integrator runtime.
- Ensure external dependencies (databases, message brokers, etc.) are configured.
Step 2: Fetch and consolidate artifacts
-
Go to the terminal on VS Code and install the
consolidate-packagestoolbal tool pull consolidate-packages -
Go to the terminal on VS Code and install the
consolidate-packagestoolbal tool pull consolidate-packages -
Pull integration artifacts from the source/artifact repositories to create a consolidated project
bal consolidate-packages new --package-path <consolidated-project-path> <comma-separated-list-of-package-names>
Note
Use consolidated-packages with exact package versions and --repository=local option to create a new consolidated package with the packages published in local repository.
For example:
bal consolidate-packages new --package-path lms_service sampleorg/lms_assessments:0.1.0,sampleorg/lms_courses:0.1.0 --repository=local
Tip
Visit the Consolidate-packages tool for more information on how to consolidate Ballerina packages.
Step 3: Add integration tests to the consolidated project (Optional)
- Write and execute tests for the consolidated project.
Step 4: Create the executable JAR for the project
- Use the
bal buildcommand to build the consolidated project. - The integration will be built as an executable JAR, and the JAR file will be available in the
target/bindirectory of the project.
The generated Ballerina artifact can be deployed to the target environment, configuring necessary environment variables and system settings.